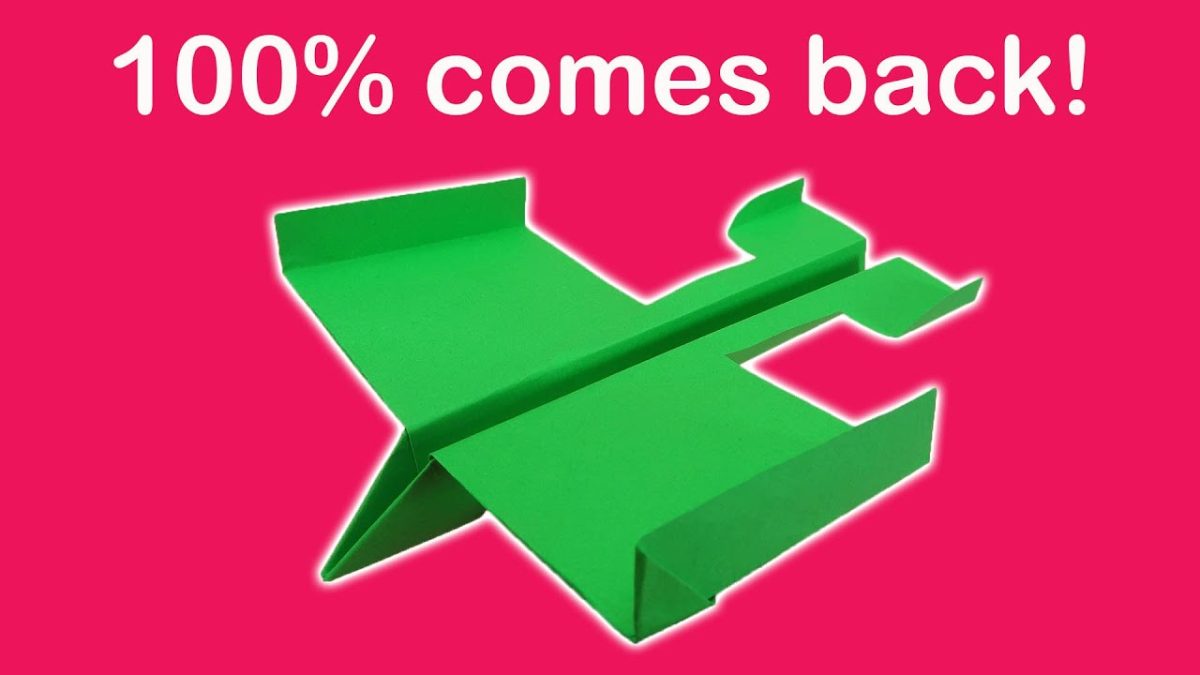
How to make a Paper Boomerang Plane | Origami Paper Boomerang Plane Tutorial – DIY
Greetings, all! 🙂 We invite you into the wonderful world of origami airplanes with our Paper Boomerang Plane Tutorial. If you want to learn how to create origami boomerang planes with your own hands, you’ve come to the right place! 🙂
In this step-by-step tutorial, we will guide you through the process of crafting your very own origami Paper Boomerang Plane. Discover the fun and creativity of DIY paper crafts projects by creating your own origami paper airplanes that will fly back to you like a real boomerang!
Let’s start this exciting journey into the world of origami boomerang planes together! 🙂
Please scroll down for a step-by-step tutorial of how to make a Paper Boomerang Plane:
HERE IS THE TUTORIAL:
to make this paper craft you will need an A4 sheet of paper and your patience 🙂
STEP 1 of how to make a Paper Boomerang Plane
Take a colored A4 paper sheet.
Choose the color you like the most.

Fold the sheet in half and meet the bottom edge with the top edge as shown in the pictures below.


Unfold the sheet to its original position.
Rotate the paper by 90 degrees and place it vertically.
This is shown in the picture below.

Fold the top corners of the sheet as shown in the pictures below.
The top right corner.


The top left corner.


This is how it should look like.

STEP 2 of how to make a Paper Boomerang Plane
Fold the top corner of the sheet downwards as shown in the pictures below.


Fold the top right and left edges of the sheet as shown in the pictures below.
The top right edge.


The top left edge.


This is how it should look like.

You may also like: FUNNY Paper Craft Idea with SpongeBob. Cardboard Toy DIY
STEP 3 of how to make a Paper Boomerang Plane
Fold the top corner of the sheet downwards.
You have to fold the paper along the dashed line as shown in the picture below.


Fold the bottom corner upwards as shown in the picture below.


This is how it should look like.

STEP 4 of how to make a Paper Boomerang Plane
Flip the paper sheet over and rotate it by 90 degrees.
Fold the paper sheet in half and meet the bottom edge with the top edge.
This is shown in the pictures below.


This is how it should look like.

Fold the just-folded edge of the paper downwards.
You have to fold it along the dashed line as shown in the pictures below.


This is how it should look like.

Flip the paper sheet over and fold another edge in the same way.
You have to fold the paper along the dashed line and meet the bottom edge with the top edge.
This is shown in the pictures below.


This is how it should look like.

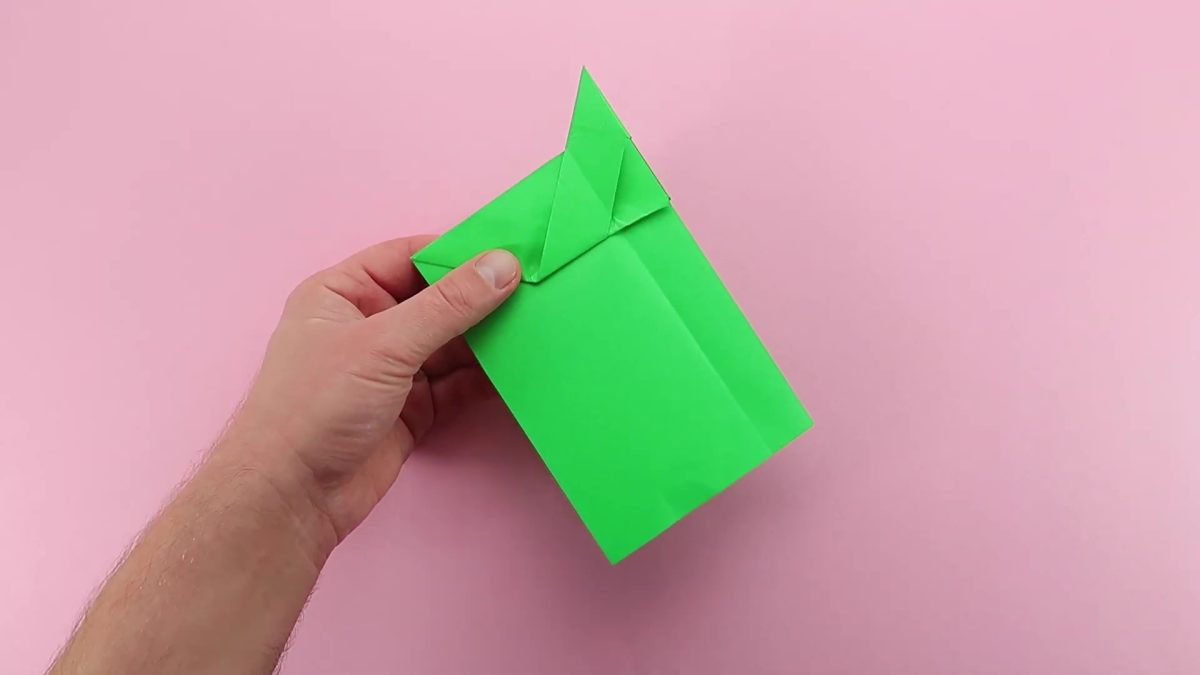
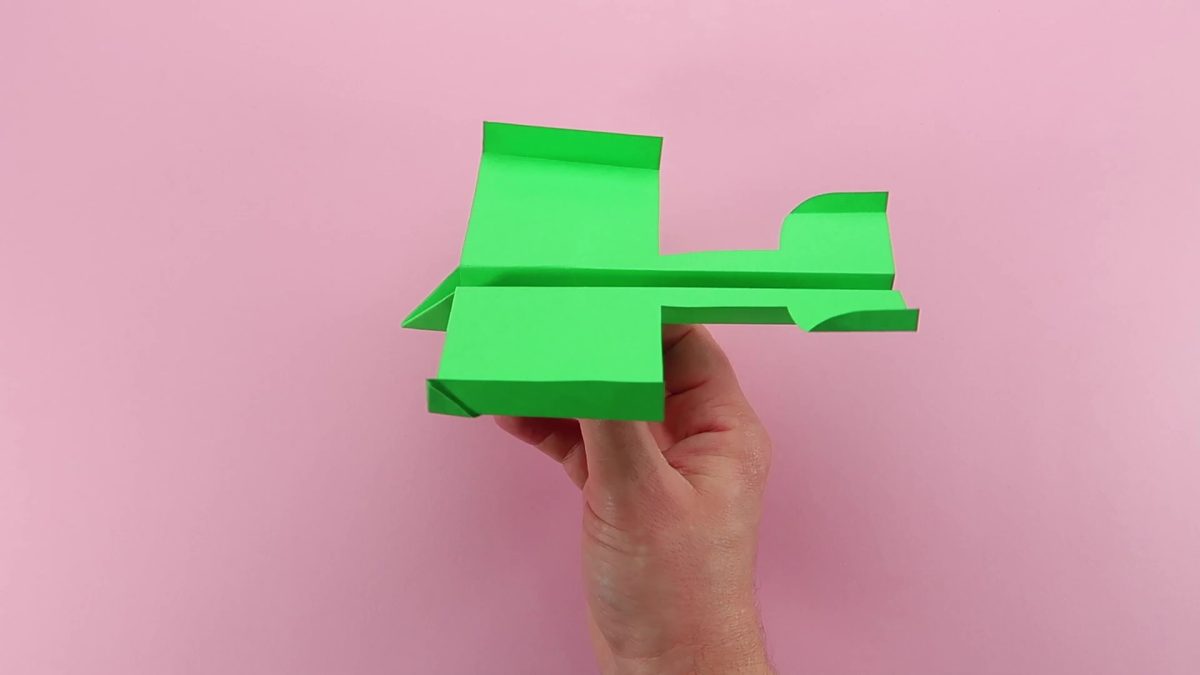
Unfold the paper sheet and check the appearance of the paper craft.
It should look like this.

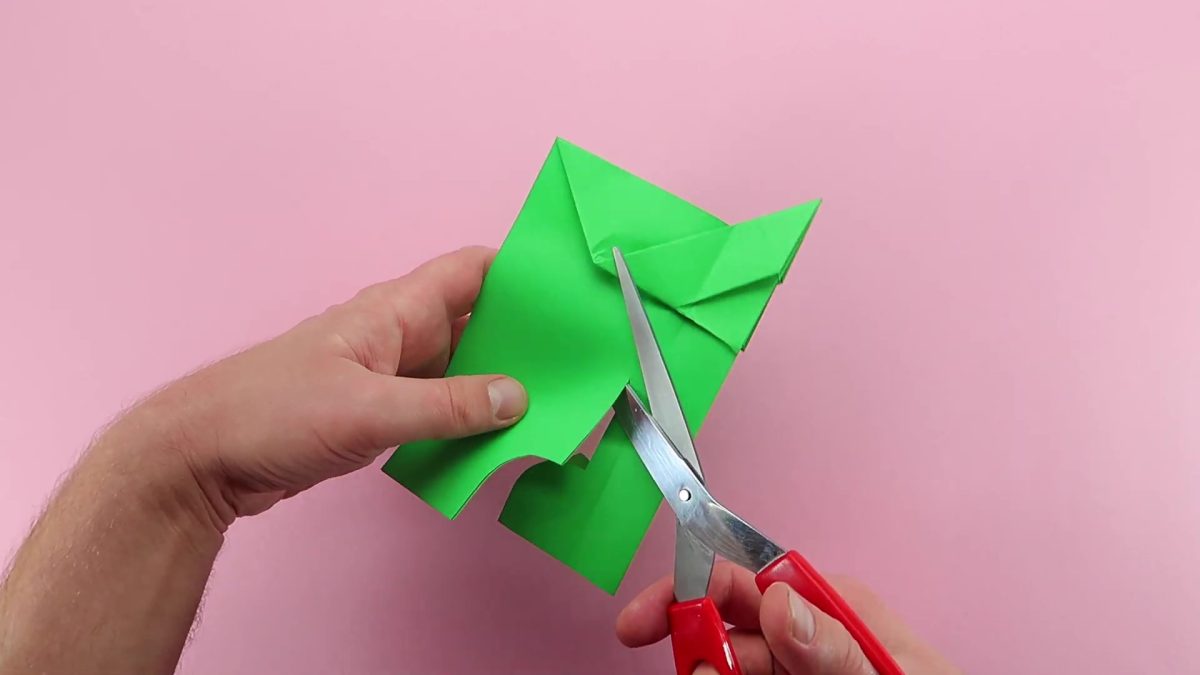
STEP 5 of how to make a Paper Boomerang Plane
In this step, you will need scissors.
Place the paper as shown in the picture below.
Make a cut of the specified shape with scissors.
This is shown in the pictures below.

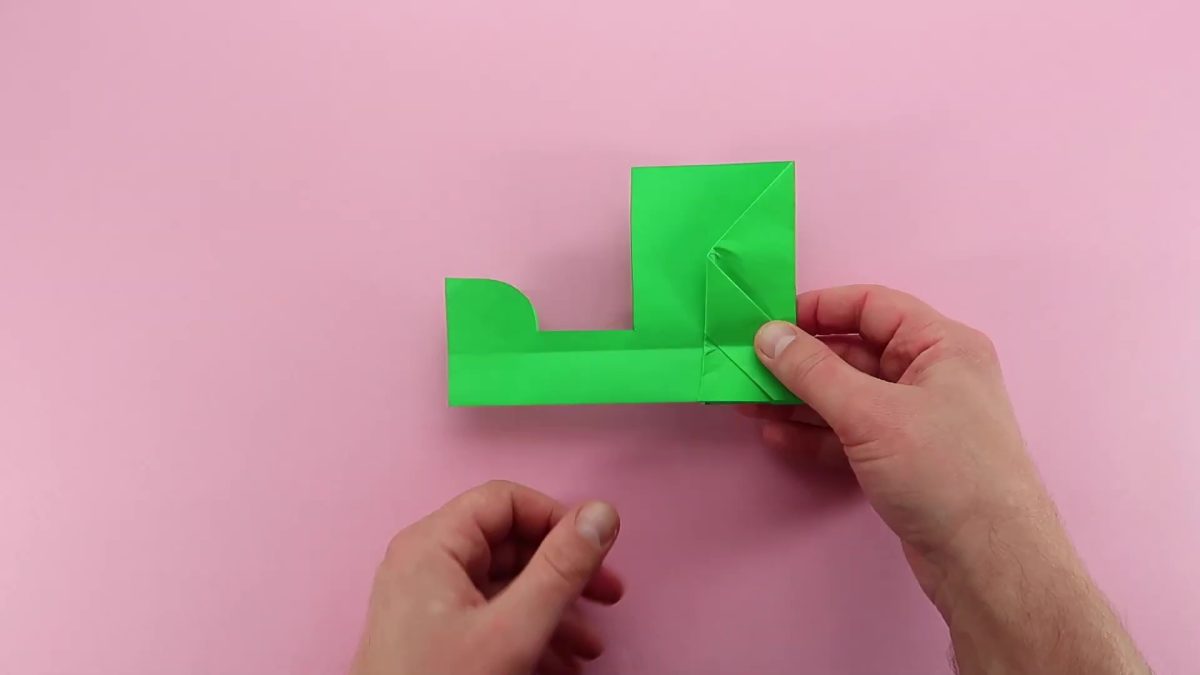
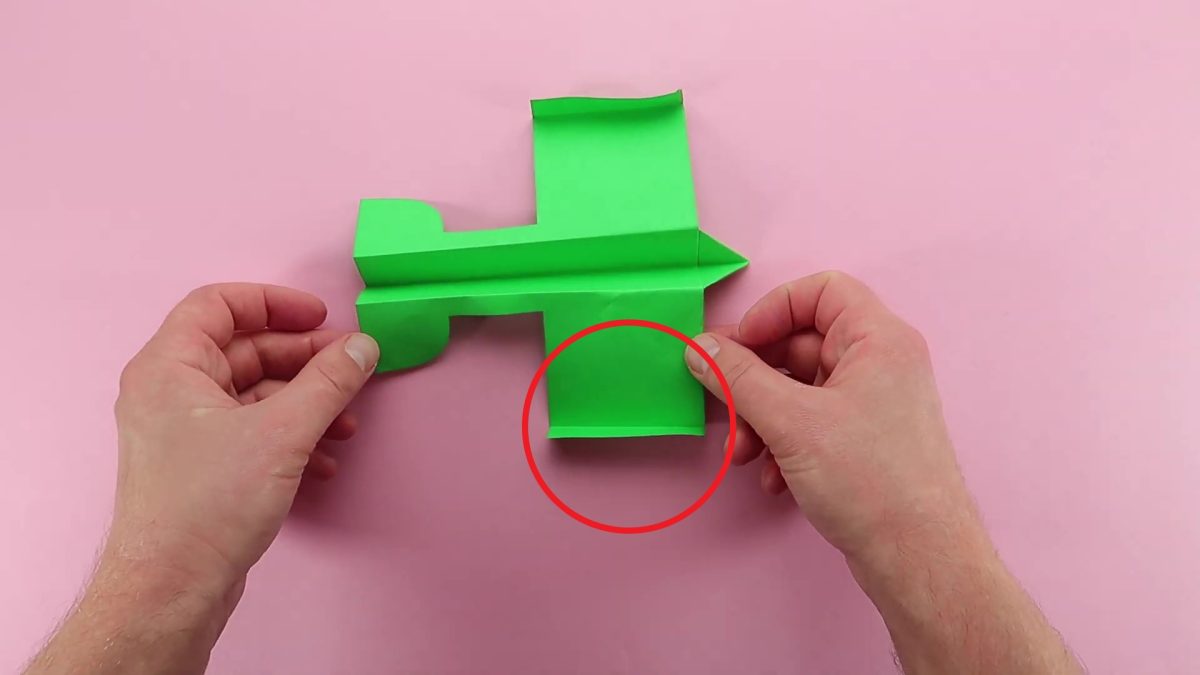
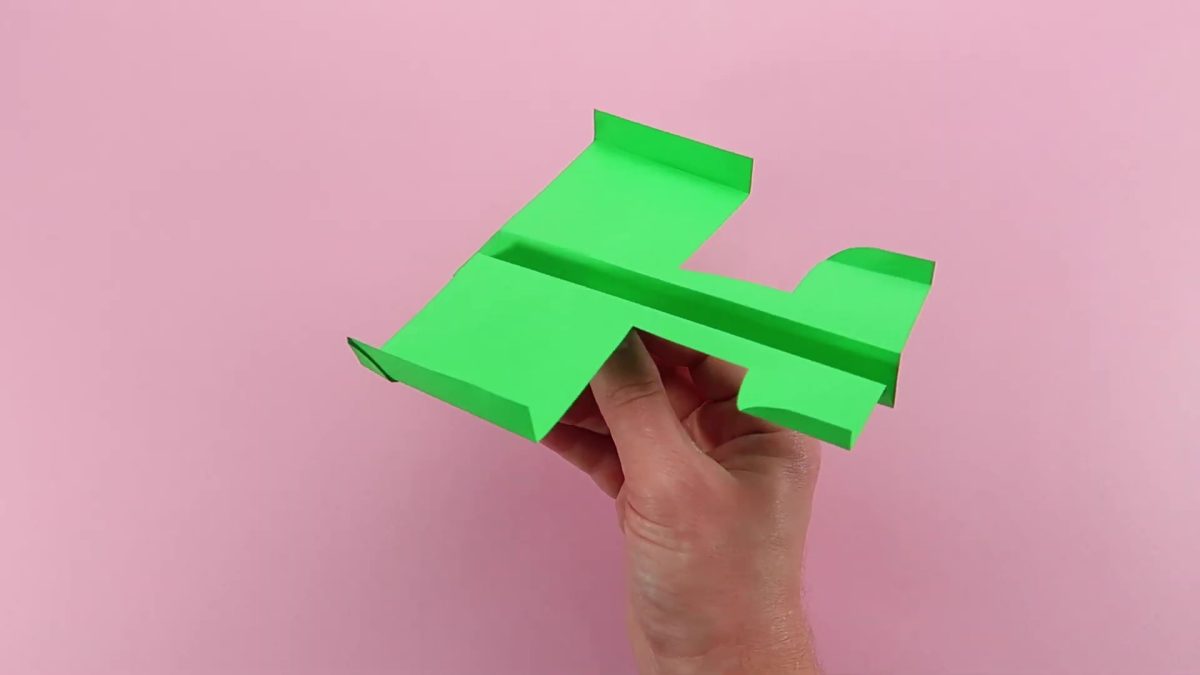
Unfold the paper sheet and check the appearance of the paper craft.
It should look like this.
Now it is necessary to give the wings the necessary shape.
Fold one wing along the dashed line as shown in the picture below.
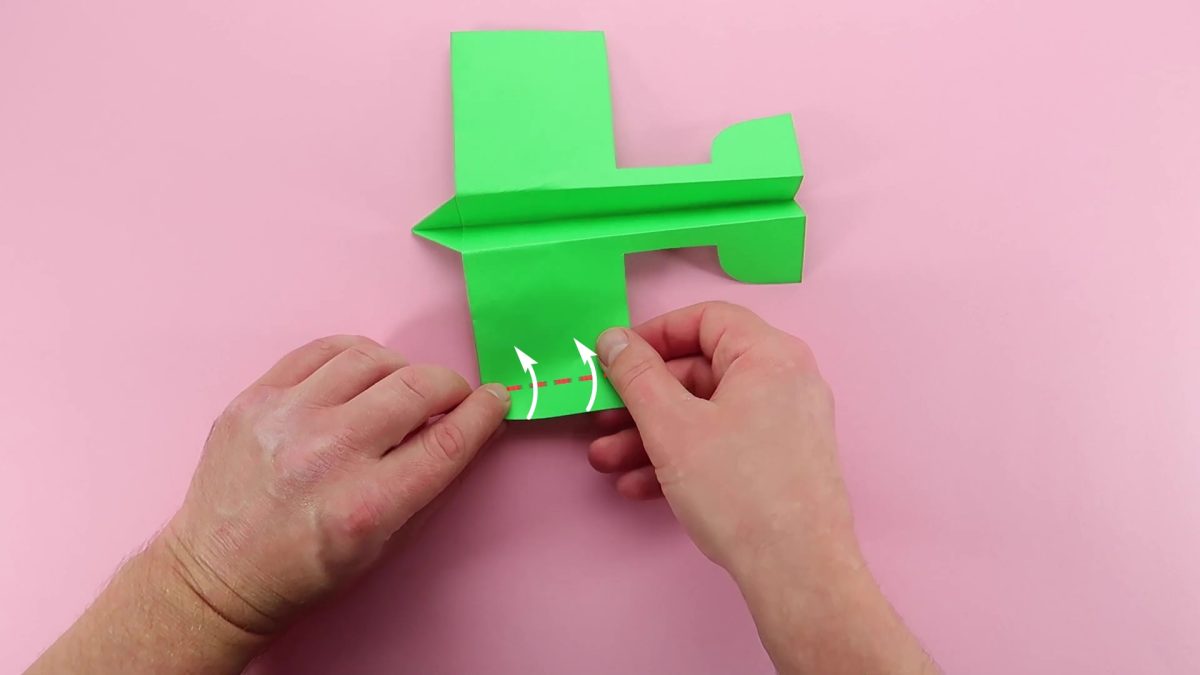
Slightly unfold the just-folded wing so that it is vertical.
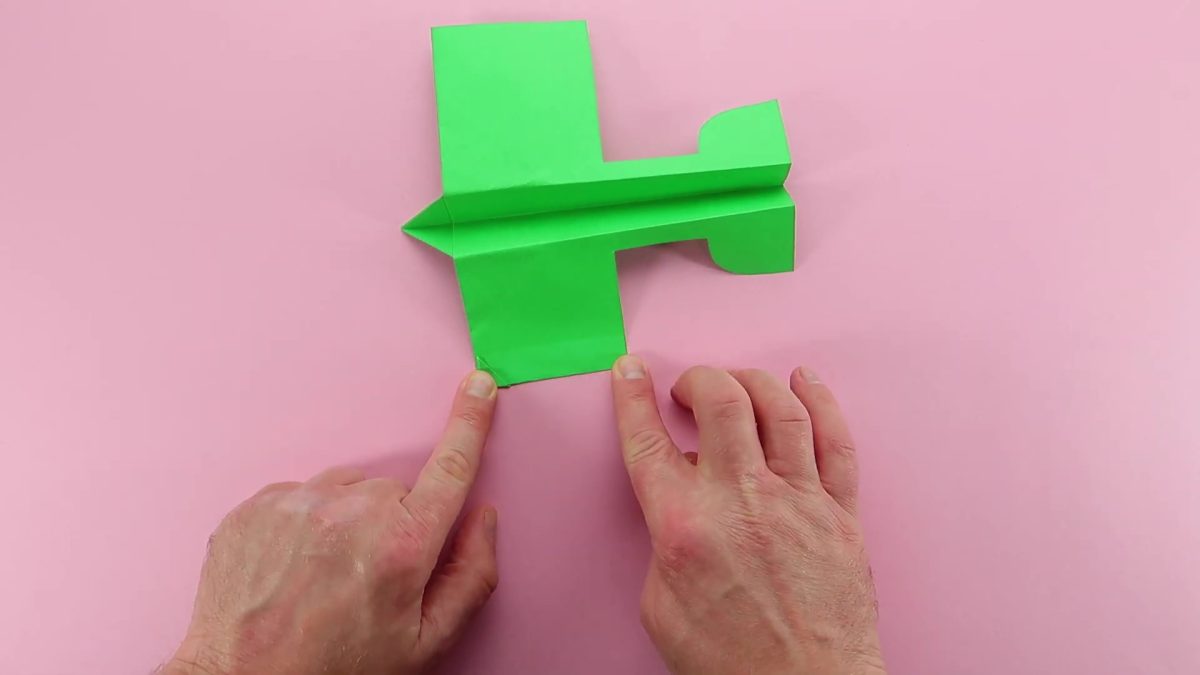
Fold the remaining wing in the same way.

Slightly unfold the just-folded wing so that it is vertical.
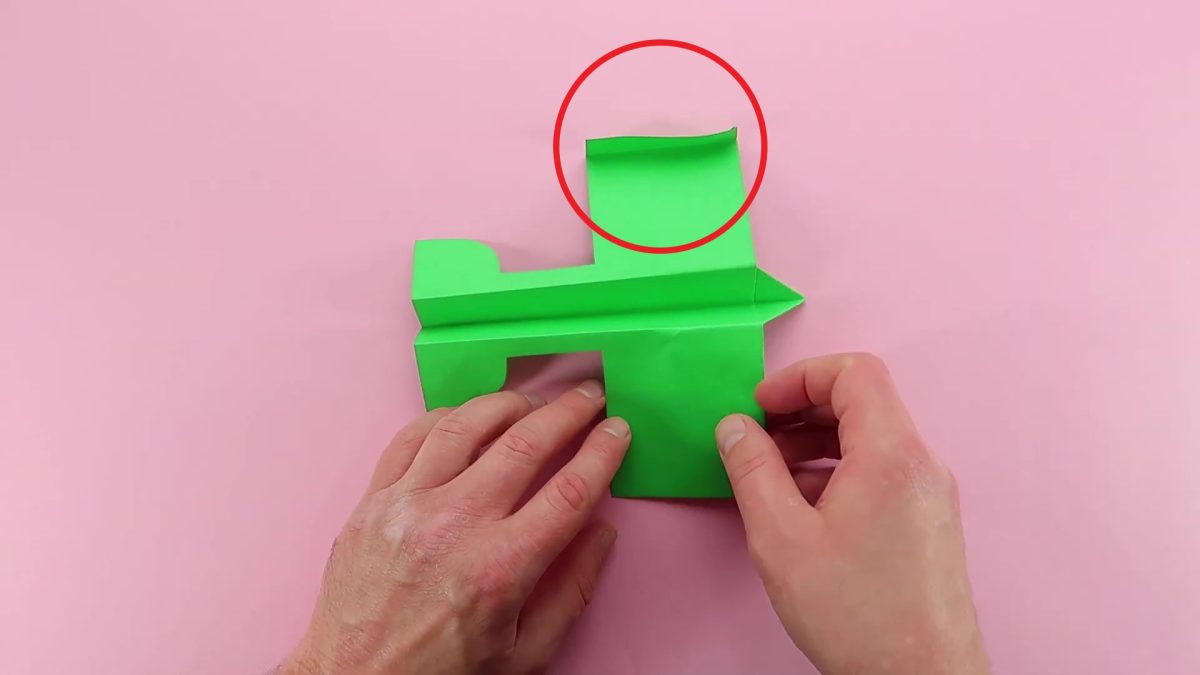
Now it is necessary to give the tail of the airplane the necessary shape.
Fold the tail along the dashed line as shown in the pictures below.


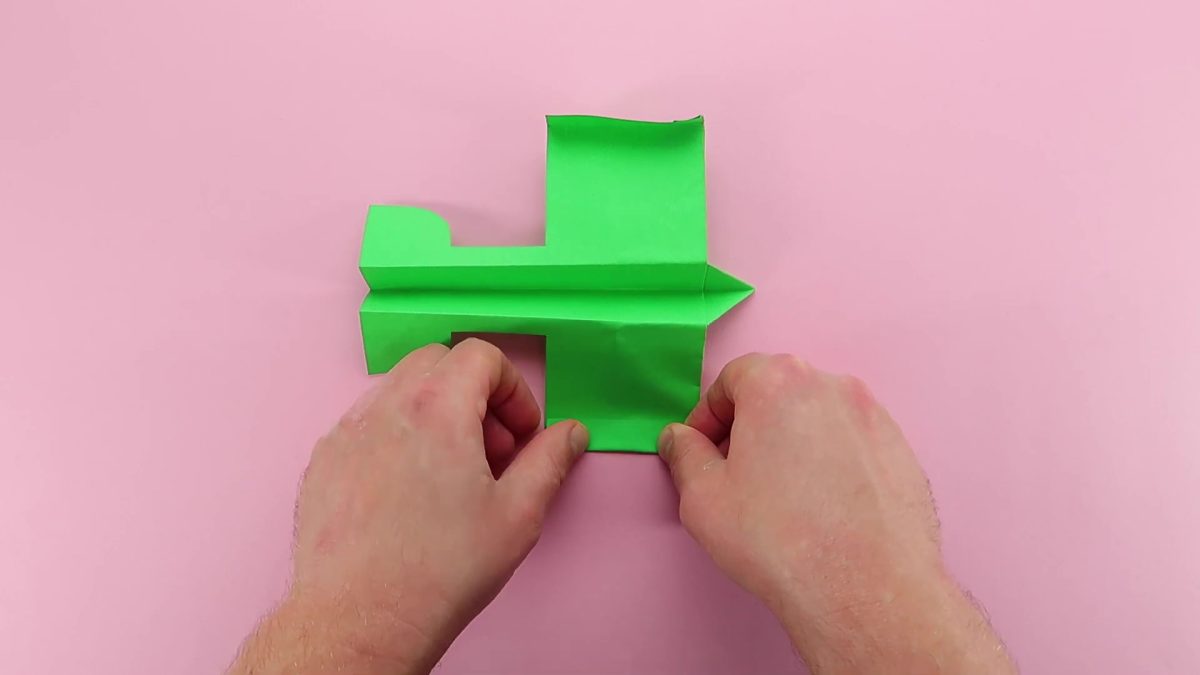
Slightly unfold the just-folded tail so that it is vertical.

Repeat the same action with the other side of the tail.
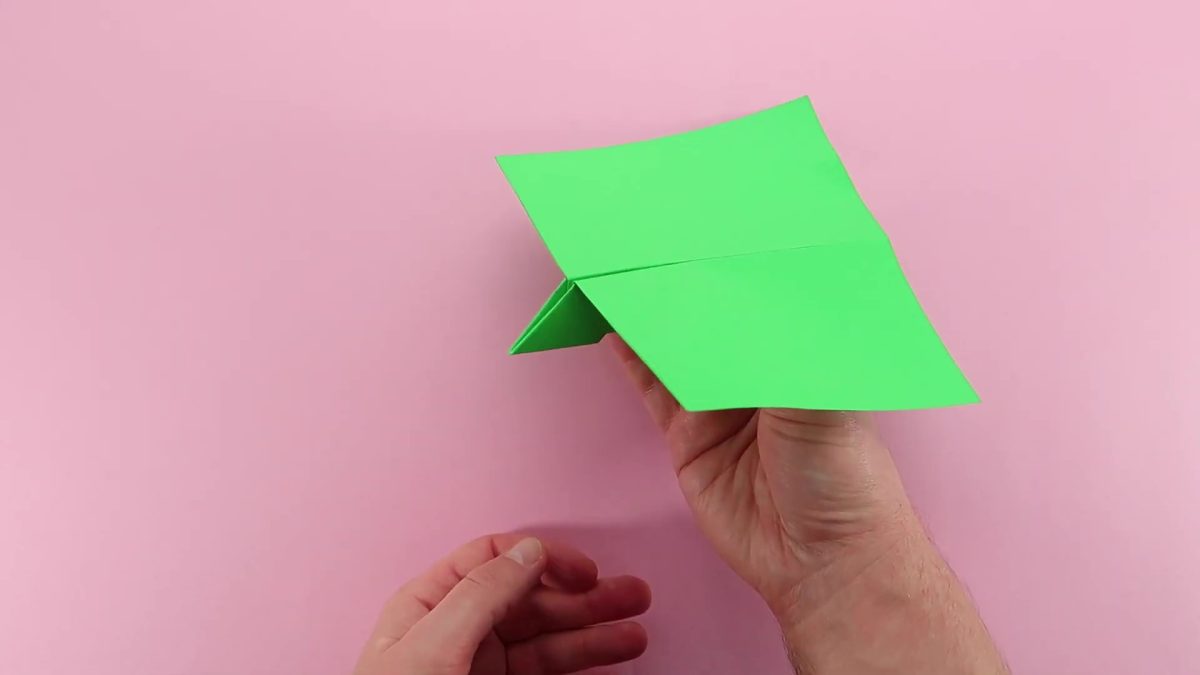
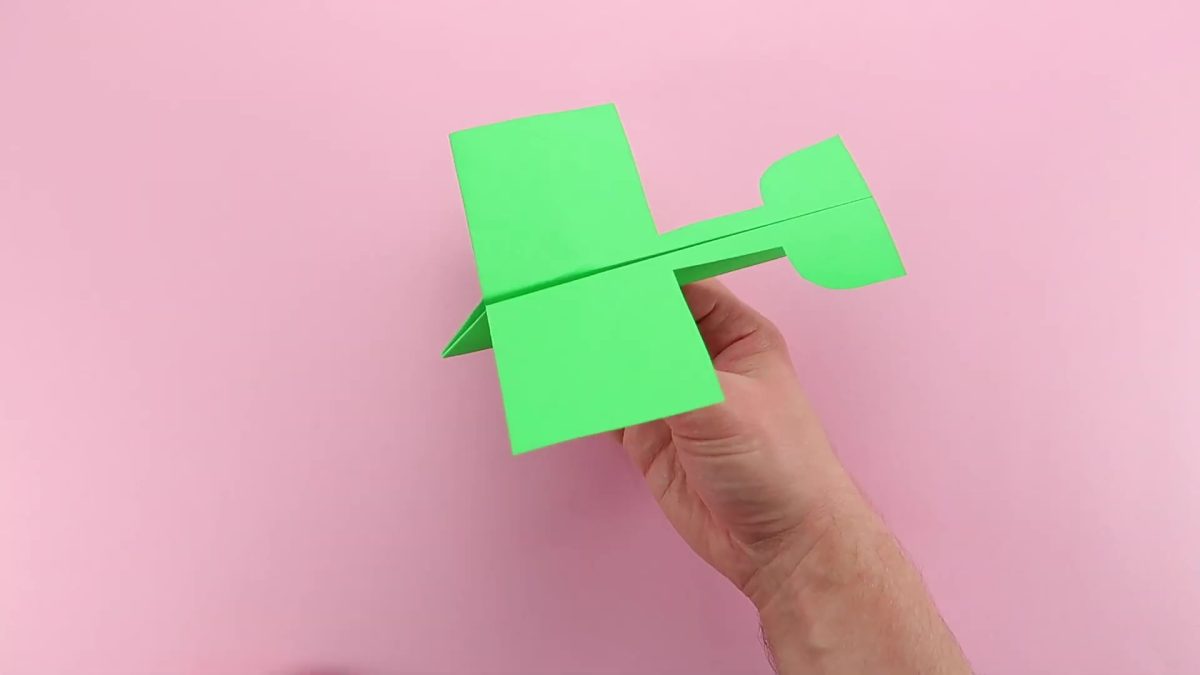
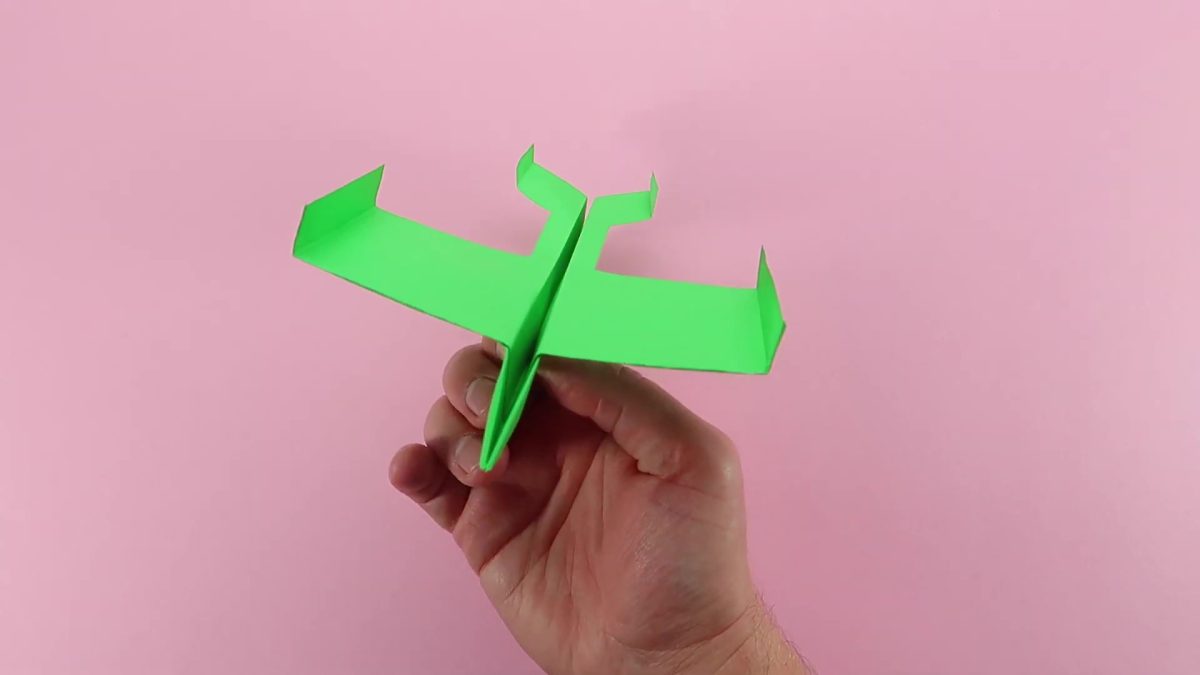
This is how it should look like.

GREAT JOB! 🙂
Origami Paper Boomerang Plane is ready!
The main advantage of this Paper Boomerang Plane is that no matter how you throw it, it will always come back to you like a boomerang!
This paper craft is great for leisure time with your friends 🙂
You may also like other paper crafts from our ORIGAMI PLANES collection 🙂
Using our tutorial, you can make as many Paper Boomerang Planes as you want and impress your friends with your origami and DIY paper crafts skills!
Congratulations! You have successfully completed the Paper Boomerang Plane Tutorial. Now, you can enjoy hours of fun and entertainment with your friends as you launch your boomerang planes into the air. Showcase your origami and DIY paper craft skills and marvel at the unique return flight feature of the Paper Boomerang Plane.
Remember, practice makes perfect, so feel free to make multiple Paper Boomerang Planes using this tutorial. Let your imagination soar as you experiment with different colors and designs. Enjoy the thrill of crafting and launching your very own origami Paper Boomerang Plane.
Get ready to unleash your creativity and impress your friends with this amazing DIY paper craft project 🙂